Showing posts with label tutorial. Show all posts

Tuesday, August 20, 2013

Tuesday Technique: Iris Folding

Happy Tuesday!  I was challenged this past weekend to use a unique paper technique on my latest Lily Bee Design layout.  I googled to find some ideas and came up with Iris Folding.  It is a simple technique that yields big results.

Today, I will show you how I did it.

First step involves creating a cut-out window.  It can be any shape, but I went with a square..  Use your craft knife.  When determining the size, be sure to consider what you are putting in the center of the cut-out and folds.


I wanted my window to contain lots of color so I used three different patterned papers.  I cut out a series of paper strips, 1 inch in width by 12 inches in length.  While watching TV, I proceeded to fold each rectangle in half. I used my Scor-it to get even, crisp folds.


Once you have your rectangles, determine a pattern.  There are a ton online that act as guides for how you might place your paper.  I went with a pattern that was structured, diagonal across the corners as a layer and then straight sides as a layer.  Then repeat.

As you work, it is important to adhere your rectangles.  I also laid them out so that the folded side was in the cut-out.  See how I first went diagonal in the corners in  yellow.  I then went straight edges in the red polka dot.  They I repeated in the corners using the navy.  You just keep repeating, overlapping the rectangles until you almost fill the cut-out.  Can you tell that I couldn't find my scotch tape?


When you have achieved the size you want, adhere another piece of background paper to fully cover the hole.  I used red cardstock to back my layout.  You can see how the red peeks through!  Here is my completed layout!  I put a sentiment in the middle of the cutout and folds, but you can do chipboard or a flower.


The folding really looks cool and adds so much texture!


Some other details of my page.  I used the Lily Bee Pinwheel collection for the majority of this page.  


The Lily Bee design team is showing you projects all week that use unique paper techniques.  Be sure to stop by the blog and see what my talented creative team members have made!


Wednesday, May 1, 2013

Sporty Fun

I have so many great Instagram photos of my kiddos playing sports.  I just recently printed them and, wow, they are fun to scrap with!  There are lots of stories to tell!

I decided to combine a couple of different sports to share her interests.

Here is the layout I came up with!


I made the arrows on this page using basic shapes and the chipboard banners.  They were fun and easy!  Head over to the Lily Bee blog to see how I made them.


Here are a few close up shots!  I combined the arrow with the typography with other fonts to create my title.


We are in the midst of spring sports and I love it!  But I am craving some good old-fashioned scrappy time too!


Wednesday, September 5, 2012

Sprinkling Some Love

So I am sure that many of you have heard about the new monthly Sprinkles Craft boxes that Webster's Pages is offering.  It is a small box full of treats just for you...because you deserve it.  The little boxes are only $10.00....WHAT!

The September one sold out quickly...if you are looking for information about October's box...go here!

I got to design with the September box and it was soo much fun!  I kept my mini clean and simple, yet it is so pretty.  A gift for a special friend...

Here are a few pages.  I will share the rest this week!

First, the cover...all I added was trim and the accent.  I love the metal clip.


A little unique twisting of ribbon and little touches...the pages themselves are so pretty, even without the extras.


Here is the dimension...

 
The book will make a great gift...a sprinkling of love from one friend to another!  If you are interested, there are downloadable, step-by-step instructions over at the Webster's website.


Wednesday, August 8, 2012

Behind the Project: Altered Tart Tin

So, I have a secret to tell.  When asked which assignments I would like to have for Webster's this month, I inadvertently chose an off the page tutorial.  I meant to pick a layout assignment.  It is what I am used to...what I trust.

But, I had to live up to my sign up erro and go for something off the page.  I quickly remembered these adorable tart tins I had been hoarding.  I meant to alter them at some point so why not now?

I decided to make a vintage ornament.  Something I could hang from Ella's mirror or the knobs of my jelly cabinet.  Something that would look vintage and pretty.

Using Webster's pages products makes home decor projects easy to make.  There are so many gorgeous options to include in any project.  This is it:


The tart tin is at the top of the ornament.  I kept it simple with a piece of trim and a Perfect Accent. 


I made the orb and strung the new gorgeous charms from Webster's.  It came together easily and is just what I wanted it to be. 

To learn how to make one of your own, head over to the Webster's blog for a step by step tutorial.


Saturday, January 14, 2012

I can't give a funny title because I am not sure what day it is

Can you tell CHA is here?  LOL!  Busy, busy scrapping...wonderful, beautiful product.  I can't wait to share...

I do have a layout I can post...it reminds me of summer days.  Steven and I were talking last night about how dark it is at 5:00.  It is a bit depressing...I know it will be spring before we know it with summer to follow.

In the meantime, I am scrapping it!


This was up over at the Webster's Pages blog last week!  It showcases the new Sunday Picnic line...isn't the Clean & Simple divine?  The solids are great!  I still want interest so I added several circles.  I have an easy tutorial for how to recreate the blocked circles here. 

This one shows the new bling in this collection!


And a close up of my circles!  I adore the new mini princess petals.  I am sometimes not a flower girl...these little stunners will change that!  It gives that touch without overwhelming!


Off to snuggle up with a hot cup of coffee...it is freezing outside!

Tuesday, December 20, 2011

Behind the Page: Seeing Smoke

or maybe ice...what do you see then you look at the blue patterned paper below?  I saw the zigzags and immediately went to icicles hanging down on a frozen winter day!  That warrants cutting, right?  Can't have icicles without falling snow so that was next!

I love looking at hidden ideas and themes within scrappy goodies.  Folks in my field might refer to that as figure-ground...there may be figures or images in the background!  Looking with curious eyes makes scrapbooking interesting!

I recently created this layout for a class over at The Nook.  It features the beautiful Dec. kit featuring Crate Paper. 


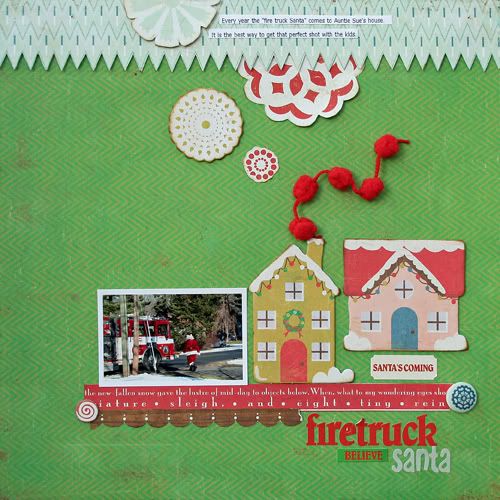
I love those little houses so much and wanted to integrate them into a layout!  This idea was triggered once I found my firetruck Santa pictures!  I decided to enhance the houses by making some smoke!  The pompoms of the Crate trim easily transform into puffs coming out of the chimney.


To finish it off, I addes some strips and a brad!  Small touches that make it complete!

I am so ready for winter break...I am needing a perspective change and know that one is just around the corner...just like Santa!

Hugs!

Saturday, October 15, 2011

Behind the Page: Using It All Up

Happy Saturday!  I am so craving the weekend today!  I hope to scrap a bit and take a ton of photos!  I wanted to share a page and give some background about how it was built.  I always love reading about how others construct their pages!  Everyone has a different take and it is interesting to get inside the creative mind!

I made this layout recently with my October Nook kit!  It features My Mind's Eye Lost and Found Sunshine...I have to say that this color palette is amazing!  I have been attracted to soft, almost monochromatic layouts recently so I gave it a whirl.


I started this page with the photo and the background papers and kinda built it up.  It was a process of adding different sized rectangles or strips in the right places.  The jazzy gold with the circles is meant to bring the eye to the photo. 

I made my own chipboard frame.  I love the look it gives to the picture.  I simply grabbed the packaging from the MME brads and used my Elmer's Craft Knife to cut out a rectangle.  I adhered it with pop dots!


I decided to add handmade hearts.  I used the old fold-a-rectangle-in-half-and-cut-half-a-heart-on-the-not-folded-side.  You open it up and have a symmetrical heart!  I then cut the inside of the heart out and used it to overlap.  I purposefully placed it up top because I don't do that often and I like how it brings out the photo.  I added little touches like the brads and the pin to give it all texture.


This element is heavy so I needed balance on the other side.  That led me to the bottom cluster.  I knew I wanted to put the circular brad and the numeral 7.  But those things didn't have enough substance.  So I added the stamp.  I actually stamped right onto the page, but it didn't look right.  So I stamped again on a piece of cardstock, cut it out and placed it over the other image with pop-dots.  The banners and twine give it the final touch of balance.


The touches of blue are placed in a visual triangle.  And those dark brown strips are from the cut-off strip of the 12 X 12 paper.  I like to use up as many of my materials as possible.

What is your process?  Link me up...I would love to see!


Tuesday, October 4, 2011

Have you scrapped

about why you scrap?

I decided to tackle this subject on a recent layout!  My theme really is about the whys...more specifically what I hope my kids take from my crafting. 

It is not just the family memories.  I want them to be inspired to be creative...art, scrapbooking, music, decorating...whatever!  I want them to be reflective.  I hope they keep journals...I loved practicing the art of journal...it frees your soul!  I want them to tell stories...write and record.


I created those journaling pockets using the Webster Page's journaling cards.  To see how, head over to the blog and check out my tutorial!

I love to scrap and want my kids to understand the benefits.

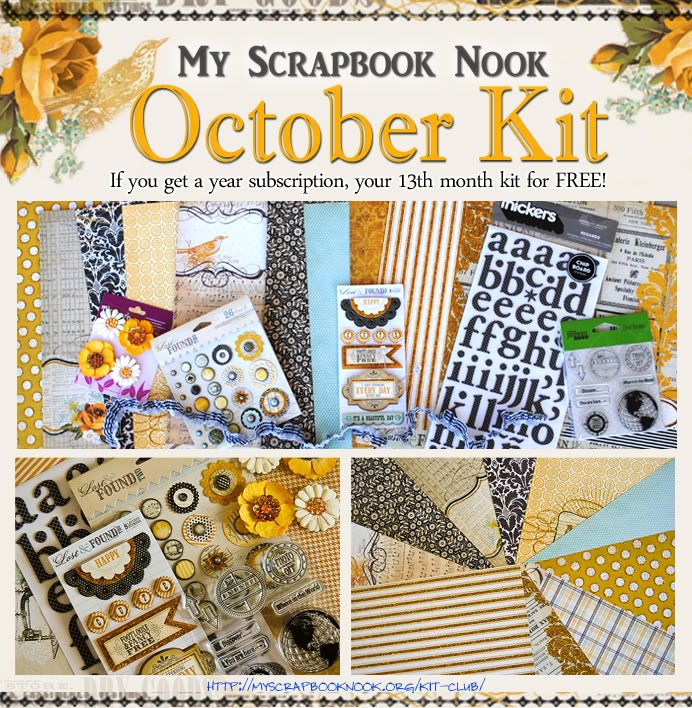
Before I go, I wanted to share the October kit from The Nook...this color combo is beautiful.


Rush over and get this one...it won't last long!

Saturday, June 11, 2011

Let's Make a Deal

Ahh...Saturday and I am glad!  I have done little scrapping this week and I need to spend some quality time with my stuff!  I have lots of a gorgeous My Scrapbook Nook kit sitting right in front of me!  It is a purty one!

Here is a project I made with it recently! 


I am enjoying playing with design and placement of things!  As you can tell, I went top heavy on this layout!  I like the effect!  If you would like to see how I created this page, check out my class at the Nook right here!

Now on to the deal!

If you sign up for a Nook kit subscription anywhere between now and July 30th, I am offering the chance for you to also receive a $25.00 gift certificate to the shop!  When you sign up, be sure to tell Pam and Leah that I sent you!  Tell me as well by leaving a comment on my blog or emailing me!  Once confirmed, that will enter you into a raffle where you could win the gift certificate!  There are yummy add-ons each month and other goodies that you could scoop up with that free cash! 

I love the kits and I know you will too!!!!

And, be sure to check out Brandin's post over at the Webster's Pages blog...she is giving away two Warehouse kits...get there fast, this won't last long! 

And there are more up for sale!

Gotta love a deal...


Tuesday, April 12, 2011

Dabbling

Do you dabble in other hobbies?  Or even with other techniques or approaches when you are being creative?  I will admit, I don't always.  I think I am a lazy scrapper sometimes.  But this past weekend, I dabbled in a bit of mixed media art.  Yep, gesso, acrylic paint, watercolors and mist.  It was fun to throw inhibition to the wind and just make an expression of something I am feeling.

I had a small canvas in my stash for a long time now and always had good intentions of using it.  But, the lazy thing happened.  Or, maybe I wasn't ready to let go of design principles and just make something.  Until now...

Here is what I created:


I started with a blank canvas and added a layer of gesso.  After allowing that to dry, I simply brushed on some sand and blue acrylic paint (using random strokes).  I added a spritz of blue and a spritz of green mist.  I knew I wanted to use the new Notations line from Teresa Collins.  This line was meant to be altered and used in a variety of ways.  I used green watercolor paints to alter a sheet of Calendar paper.  I also applied some distress ink in blue and yellow.  Then I cut out the individual "numeral" cards. 


I hand drew and cut the red heart and gave the insides a spray of red ink to make it pop.  The rest is as easy as layering pieces of the sheet paper and the calendar numbers.  When I applied the sheet music, I actually used a coat of Mod Podge to make it shiny.  Nothing like some Blingage wings to finish it off and symbolize my heart that is about to soar.


The cards have pop dots underneath for dimension. I love how layered and textured it is.

Supplies:  Teresa Collins Notations 12X12 papers (Calendar, Music), Notations kit Die-cuts, Matt's Wings Blingage

I wasn't sure I was artistic enough to make something like this.  But dabbling and exploration led me there!

I think it is about time to dabble in other things too!  How about you?  I would love to see what you are creating!


Monday, November 8, 2010

Where do you find inspiration?

I find myself looking for inspiration everywhere these days.  As I flip through the Pottery Barn catalog, in advertisements and even on my clothes.  I think it comes from a need to continue to be inventive...keep things fresh!

I recently bought this sweater from Old Navy:


I love the cute little flowers...they are so simple in construction!  The minute I saw them, I knew I wanted to recreate them for a project.  Enter the Parisian Anthology collection and my November assignment for the blog.  The collection has a very cool, thick roll of tickets.  I thought...wouldn't those make great petals.  So an idea was born. 

I actually  made the flower on this layout first...I needed to have an idea of the size and scale before I planned the rest.  Once it was constructed, the rest of the layout came together quickly.  I am pleased with the end results mainly because I adore these pictures of my daughter!


To see how I made the flower, head over to the Pink Paislee blog! 

Isn't the Parisian Anthology paper so pretty.  I found it best to just dive in with your ink and see where it takes you!

Talk about inspiring!


LinkWithin

Related Posts Plugin for WordPress, Blogger...